Tech Review – TrialPad 2.1 for iPad
I love the iPad and I am starting to know more and more trial attorneys that love their iPads as well. One of the most useful tools to a trial attorney when it comes to conducting trials are their Trial Binders and the ability to use Audio/Visual to capture the jury or judge’s attention. Many courts, including the Federal Courts, are starting to provide hook-ups in the courtroom for laptops so that attorneys can use tools such as powerpoint in their trials. For the iPad lawyer who conducts trials, there is no more useful app than TrialPad.
TrialPad acts as your trial binder, laptop and powerpoint presentation, all wrapped up in one. The visual aspect of the app makes it very intuitive to use. Basically you make folders of your cases that are going to trial and you put your exhibits inside the folders. TrialPad is also fully integrated with Dropbox which makes the ease of transferring your trial binder documents into TrialPad that much easier.
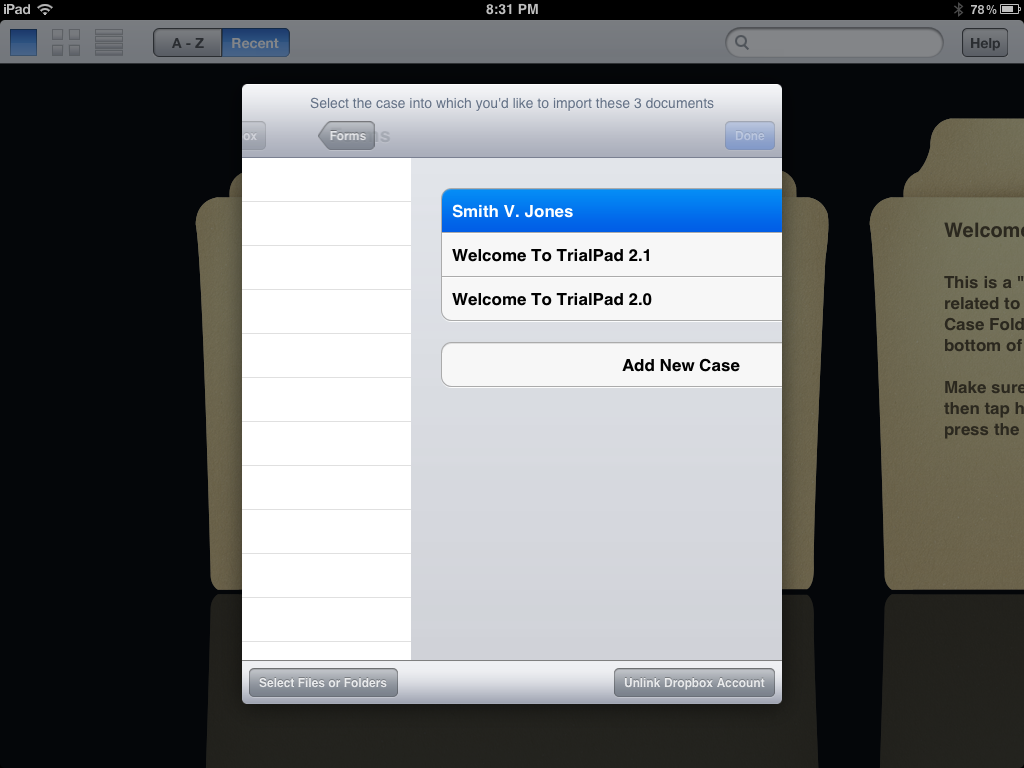
As you can see from the picture below, I’ve selected some documents (just from my forms folder on my dropbox so I’m not showing you real client files) that I can select and port into the folder I’ve created. In real life use, I would probably not port all the files all at once, but just like making a trial binder, you should be doing it as the litigation progresses so by the time trial comes around, you have a full trial binder and minimal work is required to jazz it up.
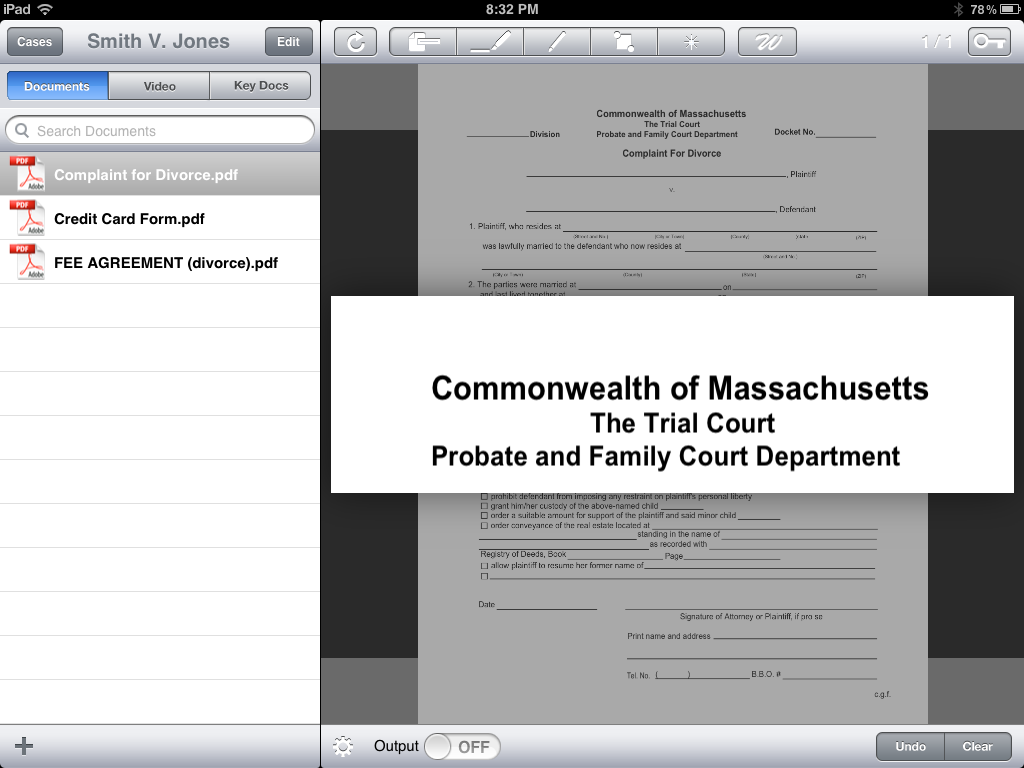
After selecting the files, it then gives me the option to put it into folders. TrialPad lets you have multiple cases at the same time. What you see below is the case I created just for this review called Smith v. Jones. The other two folders you see are the instructions that come with the app.
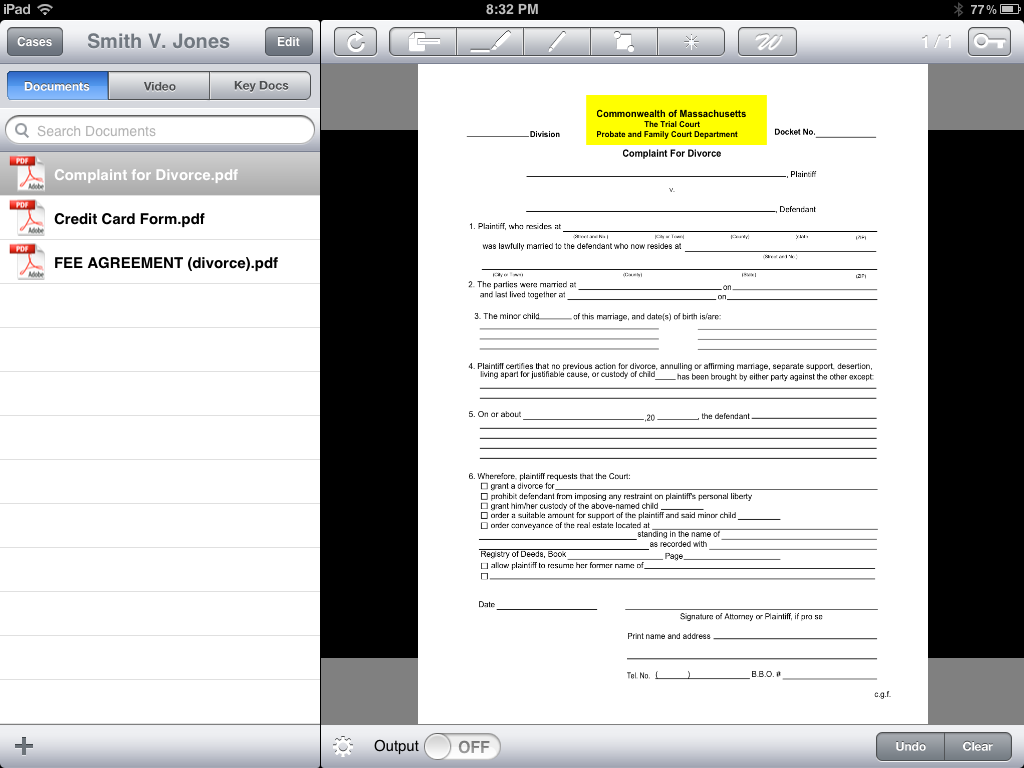
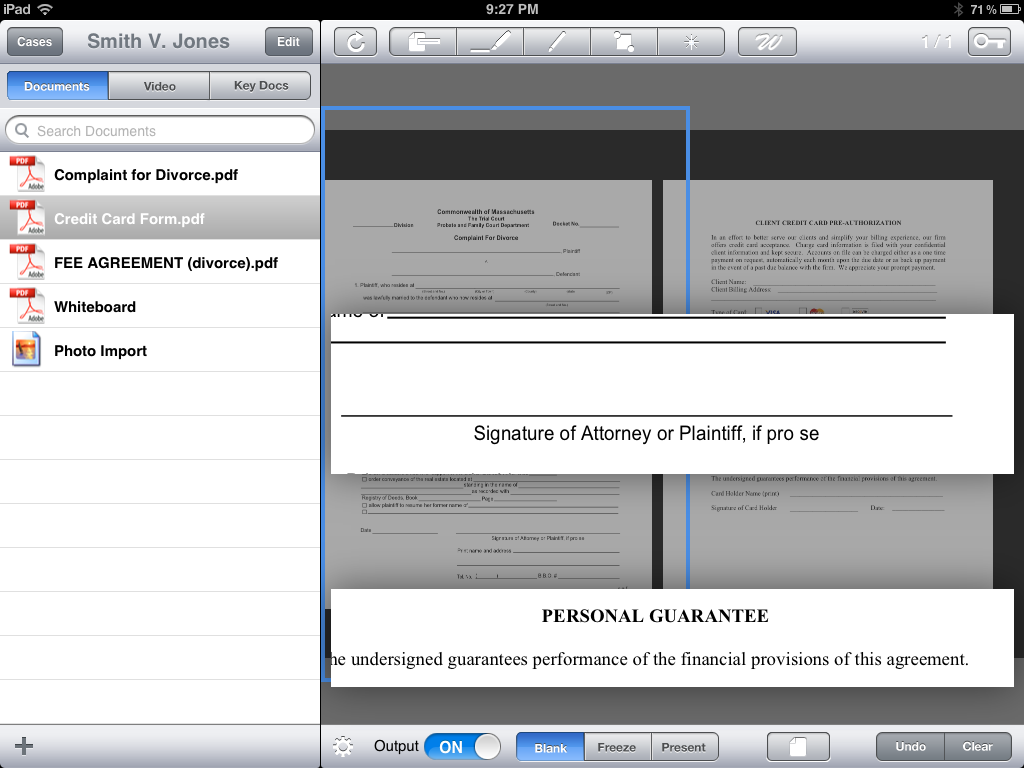
Once I get the files ported into the correct client folder, I can start to manipulate it as if I was at trial. If I had this hooked up to a projector in the courtroom, you can see that it has one of the most important function for documents in a trial attorney’s arsenal – the call out. TrialPad lets me easily select a line or block of text and the program automatically does the animation to pull it out and draws attention to it. This used to be a multi-step process when done in powerpoint but now, it’s simply a touch and drag option.
Similarly, the highlight function is useful to highlight selected text. You can combine the highlight and then call-out function to really draw the audience’s attention to the selected text. In the past, all this animation had to be pre-planned and done in advance on powerpoint. TrialPad’s intuitive touch and drag makes the process more organic and fluid and you can adopt your presentation depending on the situation. For example, if you’re questioning a witness and they reference something in a document, you can quickly go to it in your folder, highlight it and call it out. There’s no need to pre-plan.
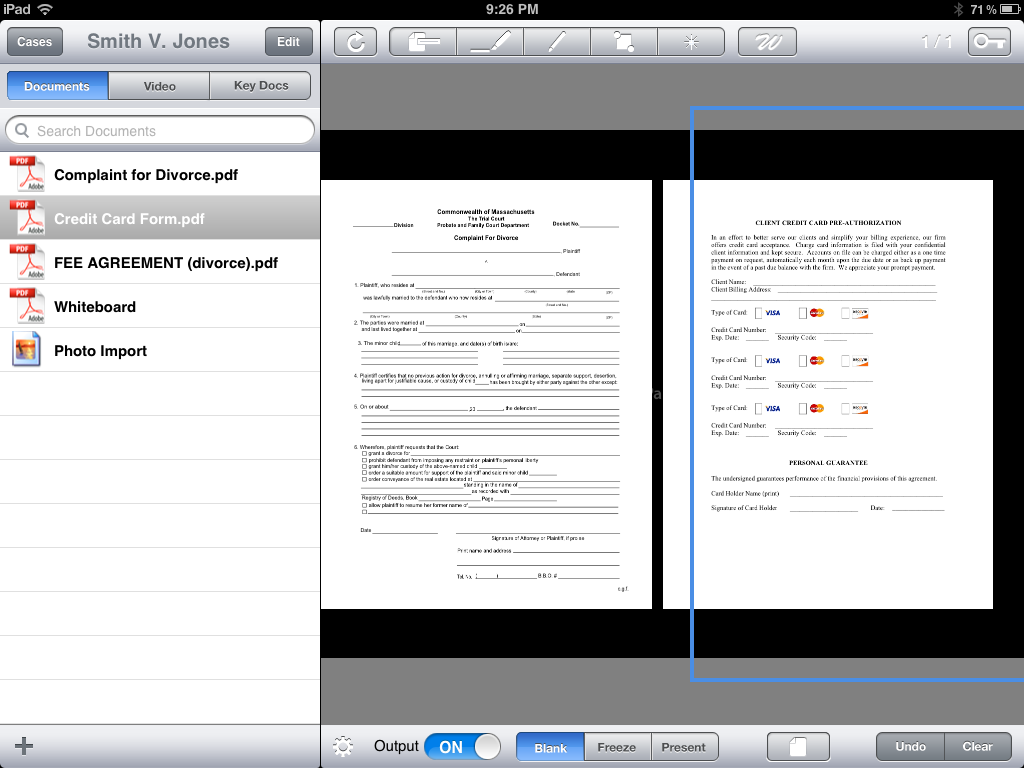
TrialPad also let’s you display 2 documents, side by side, to aid in comparison demonstration.
While in dual document mode, you can use any of the annotation tools such as call-out or highlight on both documents. This can be extremely useful if for example, you want to present evidence of forgery by comparing signatures side by side.
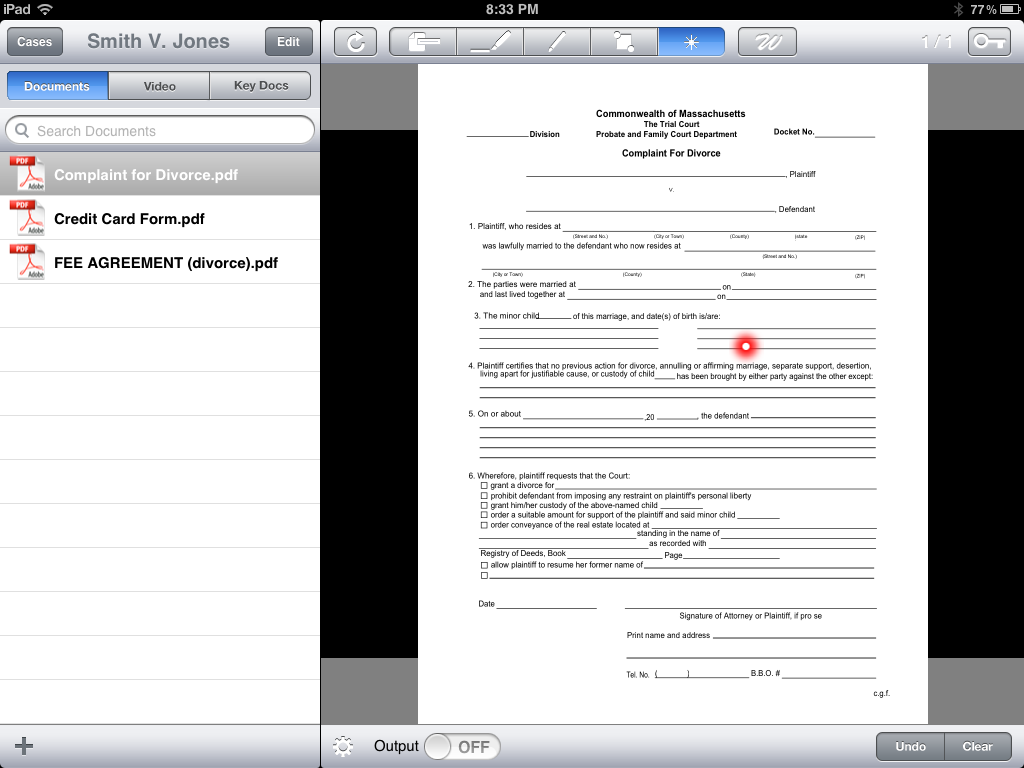
Another often used function is the pointer option. We used to have to carry around a laser pointer and while navigating a presentation, use it to point to things on a screen. Now that pointer is built in to the app itself.
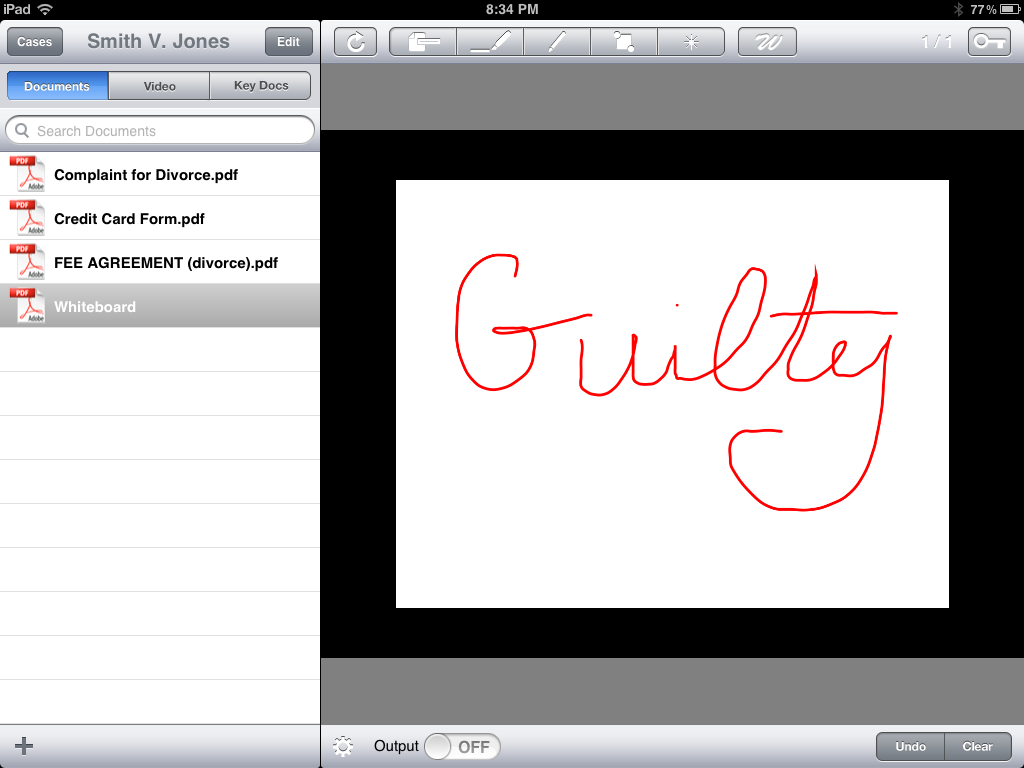
If you’re ever in a trial and instead of referencing a document, you need to explain a complicated idea to a jury or judge, there is also a whiteboard feature in TrialPad. It lets you easily create chalks for trial.
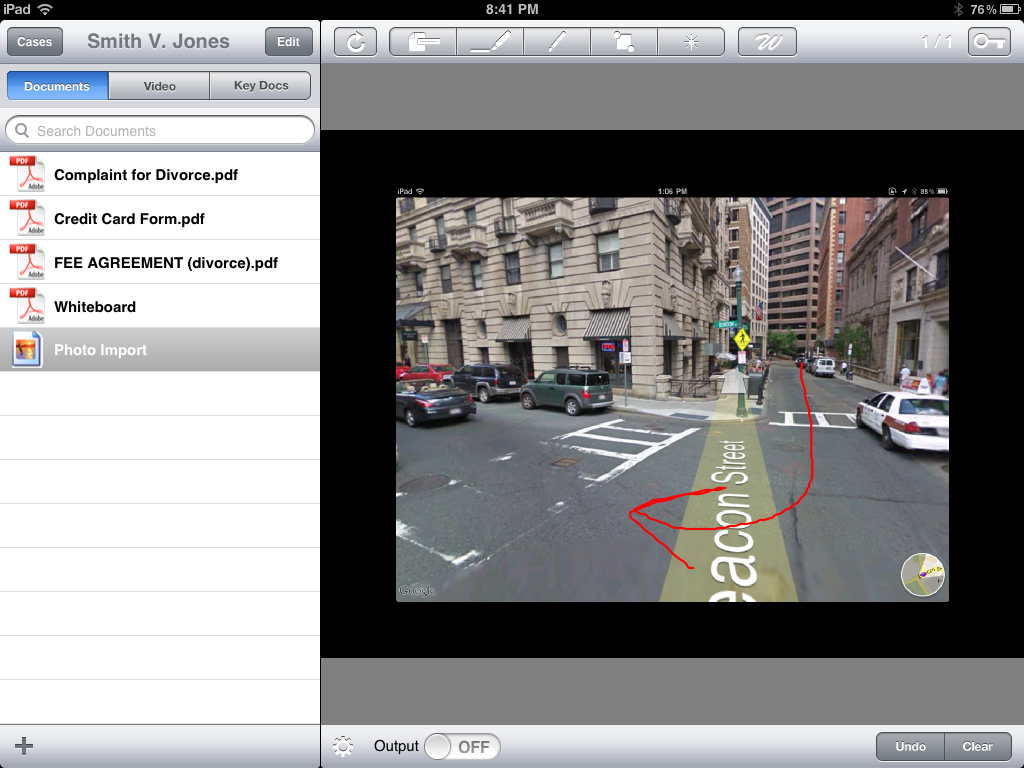
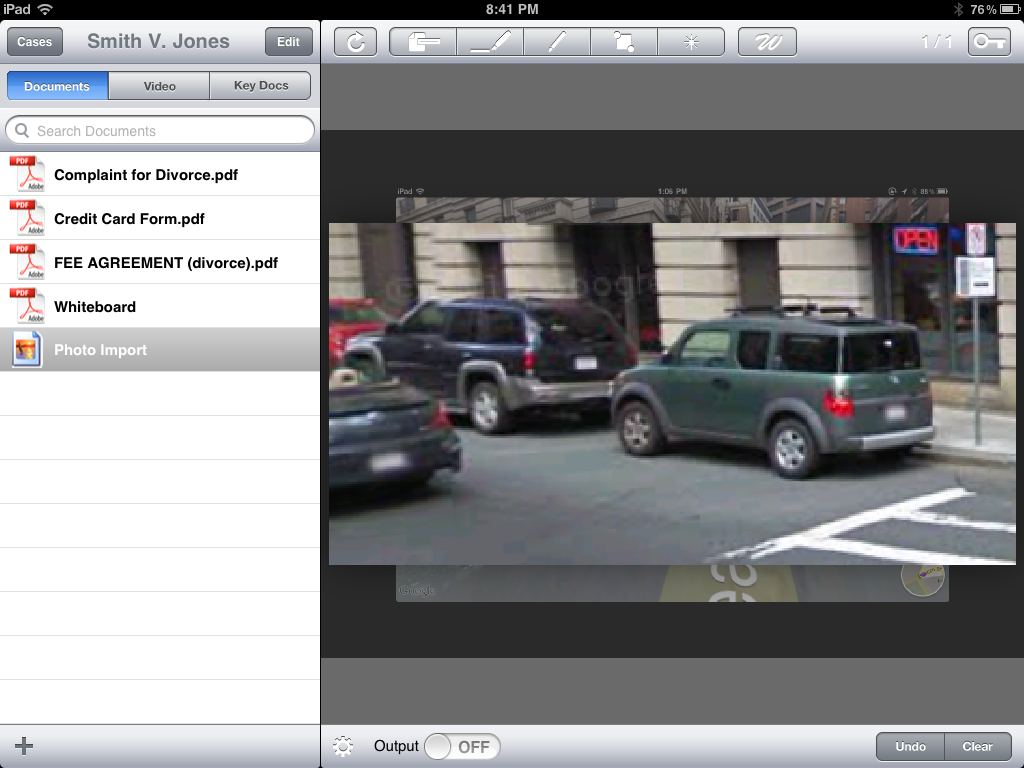
In addition to documents, TrialPad also supports photos and video. This is especially useful as you can see below. You can quickly and easily use Google Maps to pull the jury’s attention to the exact spot where an auto accident occurred and then illustrate what the witness on the stand is saying by drawing on the photo itself. This is dynamic, reactive and in real-time for everyone to see in the courtroom.
The call-out function also works for pictures if you want to direct the jury’s attention to a specific detail in a photo. For this, I would recommend a very high resolution photo.
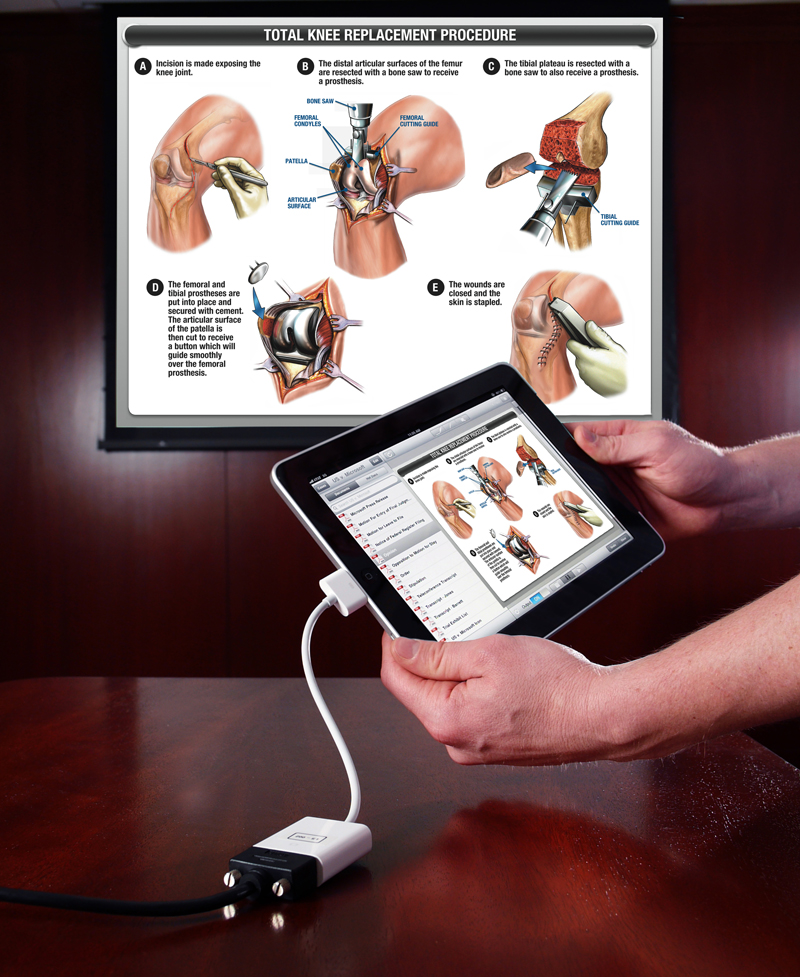
Lastly, you will notice that on the bottom of all the slides above, there is a button or slider that’s labeled “Output”. What this does is control what the audience sees and it’s not necessarily what you see on your iPad. This basically replaces the old cardboard or notepad placed in front of the projector trick. As you can see from the picture below, with the output turned on, the audience only sees the graphics part (or the right panel) of your screen, not the entire contents of what you see and functions on your iPad.
A very useful resource I’ve found in trying to figure out all the options of TrialPad or any other app is to search for it on Youtube. There are many video reviews for apps which provides a good how-to on all the features of an app.
Have fun with TrialPad!


